


Remote Access
Access your remote desktop from any device, anywhere.
 Simon Brown • Jan 16, 2024
The process of having remote access from Mac to Mac facilitates collaboration for troubleshooting, technical support, or any other collaborative work. Also, it allows the use of applications and the management of files. However, you need to adopt highly efficient methods to get all these benefits. That's where this article comes in to assist you in utilizing a smooth Mac-to-Mac remote desktop functionality.
In this guide, you will go through 4 effective and easy ways to control your Mac from any remote location and monitor the status of the system. Apart from that, this article will provide you with powerful and highly compatible software to assist you in implementing this task quite conveniently.
Yes, remote access between two MacBooks is achievable using various native features and other third-party applications. These functionalities facilitate a connection over a network, which enables smooth viewing and control of one Mac from another. Additionally, these innovative features allow users to perform tasks such as file access, application running, and troubleshooting remotely.
Eventually, it mirrors a physical presence on the remote Mac. Apart from that, these tools offer flexibility and convenience, particularly for collaborative work or technical support scenarios. To initiate the remote access process, it is important to configure the appropriate settings on both Macs.
As a result, it establishes a secure connection using different protocols, such as Apple's proprietary protocols. By adjusting preferences and permissions, a secure and controlled connection between the two Macs can be ensured, which facilitates smooth control and remote access from Mac to Mac.
This section will shed light on 4 effective techniques that will assist you in controlling your Mac from a remote. The remote Mac-to-Mac control is a bit complicated, and the procedures need attention to be implemented. That's where a user-friendly tool, Avica Remote Desktop, plays its role in making the process easy. Let's get to the methods along with their comprehensive guide.
Accessing your workplace or any necessary desktop remotely is now simplified with Avica. This tool provides comprehensive control over the remote desktop, allowing efficient file management. Avica's low-latency features ensure seamless task processing, even in areas with weaker internet connections, maintaining efficiency.
Additionally, its end-to-end AES-256 security safeguards your data, mitigating potential risks effectively. Furthermore, while connected remotely, Avica enables sound transmission to a remote device through its voice sync feature. Users can uphold session quality by adjusting settings to smooth, HD, Ultra-HD, or personalized levels. Moreover, options to customize frame rates and resolutions are also available as needed.
Feel free to download Avica software by clicking the button below. If you're seeking additional information about Avica product downloads, you can visit the Avica download page. Rest assured, Avica guarantees the safety and virus-free nature of all products obtained from the official website or app store.
Now, we’ll move towards the steps that will lead you to remote control Mac to Mac conveniently with the help of Avica:
First of all, you need to get the Avica software on both MacBooks. Then, launch Avica on Mac and log in with your Avica account.

Toggle the "Allow remote access to this device using your credentials” switch on the remote Mac device. The "Avica ID" and "Password" will be shown, and you have to take note of them.
Subsequently, activate the Avica software on your local Mac device, enter the "Avica ID" of the remote device, and hit the "Connect" button. After that, a new window will pop up, asking you to "Password". After that, a new window will pop up, asking you to "Password".

After entering the password and pressing the "Connect" button, you will be connected to your remote Mac device and can see its interface.

Apple Remote Desktop enables remote control of computers over a network without additional hardware. This Mac-to-Mac remote desktop tool grants access to the Finder menu of other computers facilitates file and folder exchange and offers the capability to establish task automation. However, both your administrator and client computers must adhere to these specifications.

For Remote Desktop functionality, Mac computers must run on OS X 10.10.5 or a newer version. Additionally, Mac client computers need to have Apple Remote Desktop software version 3.6 or later to ensure complete control. The steps involved in using the Apple Remote Desktop tool are given below:
Step 1. First of all, you need to open “System Settings” from the “Apple” menu on your Mac and select the "General" settings in the sidebar. Then, click on the "Sharing" option on the right-hand side.

Step 2. In the next step, you will have to turn on “Remote Management” and click the "Info" icon on the right. After that, activate and check the "Always show Remote Management Status in the Menu Bar" option. Now, specify access permissions by clicking the "Allow access for" menu, choosing either the "All users" or “Only these users” option, and setting options accordingly.

Step 3. Now, download Apple Remote Desktop from the App Store and set it up. We will now add clients using a directory server. Within the Apple Remote Desktop application, navigate to the main window and select the “Scanner” option from the left sidebar.
Step 4. Opt for the “Directory Server” option from the ensuing pop-up menu. Organize the chosen computers by dragging and dropping them into a designated list, such as “All Computers.” To proceed, authenticate by providing the username and password for a Remote Desktop administrator.

Screen Sharing, a native feature in macOS, enables remote access and control of another Mac within the local network. To utilize this capability, ensure that Screen Sharing is enabled in the System Settings of both MacBooks. Then, you can follow the below-stated guide to remotely connect Mac to Mac via the macOS screen-sharing feature:
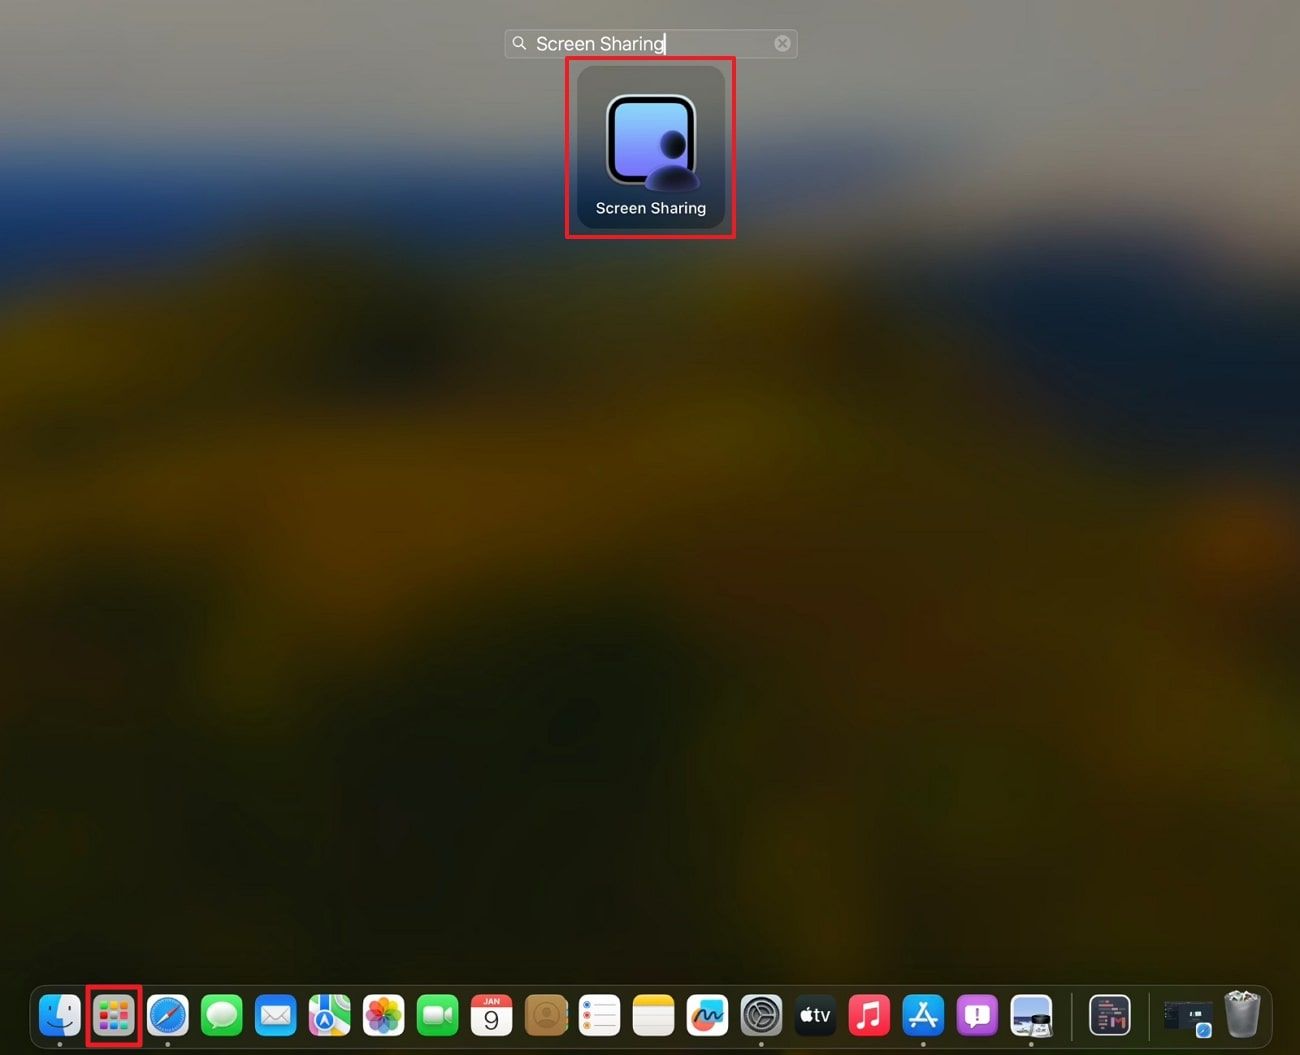
Step 1. Commence the procedure by opening the "Screen Sharing" app on your Mac. Locate it by clicking the "Launchpad" icon in the dock, searching for "Screen Sharing," and selecting the app icon from the search results.
Step 2. Within the Screen Sharing app on your Mac, opt for the "Network" tab in the left sidebar. Hover over the "+" icon and, enter the "Hostname" or "Apple ID," and press the "Connect" button to connect to other Mac devices.

Step 3. Next, if prompted, enter your "Username" and "Password" and click "Sign In." If the "Select Screen Sharing Type" window appears, you need to choose either "Standard" or "High Performance" option. If High Performance is selected, click the "Display Type" drop-down menu, select one or two virtual displays, and then click "Continue” to complete the task.

macOS incorporates Remote Login, also referred to as SSH (Secure Shell), enabling remote connections to a Mac via a network using the command line interface. This functionality ensures secure communication between two Macs or between a Mac and another device by initiating a terminal session. Here's how to remotely connect Mac to Mac via the macOS Remote Login feature:
Step 1. You will have to start by accessing “System Settings” on your Mac by clicking the “Apple” menu. Then, click the "Sharing" option in the sidebar under the "General" settings.

Step 2. Subsequently, you need to enable “Remote Login” by turning it on and clicking the “Info” icon for additional settings. Afterward, choose the desired access permission by selecting the "Allow access for" option for either the "All users" or "Only these users" option, and set the configuration accordingly.

Step 3. Now, on another Mac, you will have to open “Terminal” and type the SSH command in the “sshusername@hostname” format. Here, you need to replace “username” and “hostname” with appropriate details. After that, you can enter the “Password” when prompted to log in remotely.

We have comprehensively elaborated each way, focusing on their guide. Now, let's go through a quick review of each method and deduce the best way to remote control Mac from Mac.
|
Metric |
Avica Remote Desktop |
Apple Remote Desktop |
macOS Screen Sharing |
macOS Remote Login (SSH) |
|
Effectiveness |
High |
Moderate |
Moderate |
Moderate |
|
Efficiency |
High |
Moderate |
Moderate |
Moderate |
|
Difficulty |
Low |
Moderate |
Low |
High |
|
Cost |
Free |
Paid |
Free |
Free |
|
Safety |
High |
Moderate |
Moderate |
High |
|
Accessibility |
Easy |
Moderate |
Easy |
Difficult |
|
Customizability |
Moderate |
Moderate |
Low |
Low |
|
Stability |
Hig |
High |
Moderate |
High |
In a nutshell, you can control your Mac with different techniques using the simple guide we have provided in this article. Also, each method possesses its own requirements and preferences that need to be followed properly. However, Avica Remote Desktop provides a secure and high-performance solution for remote access from Mac to Mac. Plus, this tool provides various other advanced features to customize your needs according to your requirements.

Connect Everything, Work Anywhere


