


Remote Access
Access your remote desktop from any device, anywhere.
 Simon Brown • Apr 15, 2024
Have you ever been stuck in a situation where you want to transfer photos from a MacBook to an iPhone but are unaware of the transfer process? For this purpose, you require an appropriate and dedicated method to help you in this situation.
However, macOS prioritizes its security limits to provide you with a safer and more reliable experience. This article will discuss every possible solution, from wireless to wired, which will guide you in effortlessly exporting photos from Mac to iPhone. Thus, let's start the process of exploring all the possible methods.
If you have switched from Windows to macOS, you might be confused about its interface. For this purpose, you might experience the issue of transferring photos from your MacBook to your iPhone. To help you with this problem, we will discuss the best possible methods for transferring photos from a MacBook to an iPhone without a cable wire.
As you know, using a dedicated file transfer tool to transfer files from Mac to iPhone always remains the best choice. Therefore, you can utilize the Avica Remote Desktop app to smoothen the process of transferring photos between macOS and iPhone. This incredible tool allows you to use a patented protocol for a quicker file transfer process.
Overall, Avica, with its innovative file transfer algorithms, allows you to transfer unlimited files across devices without restricting file formats. This tool is accessible on iOS, Android, Mac, and Windows devices, so you don't need another tool for your other devices. In addition, the Avica remote desktop prioritizes session security between remote connections and provides AES-256 end-to-end encryption.
We have discussed some major key features that will help you understand Avica's functionality. For a quick file transfer, here is the step-by-step guide you can follow to export the images from a MacBook to an iPhone without using wire.
Feel free to download Avica software by clicking the button below or download Avica mobile app from Google Play and App Store. If you're seeking additional information about Avica product downloads, you can visit the Avica download page. Rest assured, Avica guarantees the safety and virus-free nature of all products obtained from the official website or app store.
Install and launch the Avica remote desktop app on your macOS and toggle “Allow Remote Access to This Device via Your Credentials.” Then, copy your Avica credentials, which are your Avica ID and password, and access your iPhone to install the Avica app from the App Store.

Once you have launched Avica on your iPhone, add the Avica ID to the "Remote Connection" you copied from the MacBook. Continue by tapping the "File Transfer" button, and providing the temporary password.

Press "Download Files" on the next screen. After this, select the folder where you have saved the photos on your MacBook. Once you have selected the images from your macOS device, hit the "Download" button, and it will be instantly downloaded to your iDevice. Finally, open the file you want to export, hit the “Share” icon, and press the "Save Image" option from the extended list.

AirDrop is a groundbreaking feature that is provided on MacBooks, iPads, and iPhones. With this feature, you can transfer photos from your MacBook to your iPhone located nearby without using a wire cable. However, AirDrop is restricted to sharing media files with the Everyone feature with a time limit of 10 minutes.
To begin the process of how to export photos from MacBook to iPhone via AirDrop, follow the step-by-step guide down below:
Step 1: Locate both Apple devices nearby and turn on the AirDrop by setting it to Everyone. Then, find the image from the MacBook and press Control-Click simultaneously using the keyboard. Continue by selecting the "Share" option from the extended list and press the "AirDrop" option later. Once done, a pop-up window will appear, and you will have to choose your target iPhone name from the list.

Step 2: Once you have selected your iPhone, move towards your iPhone and accept the incoming confirmation message to get the image files from your MacBook.

Apple has designed iCloud to interlink Apple devices with enhanced security features. However, the iCloud Photos app is a reliable method to transfer photos from a MacBook to an iPhone wirelessly. If you need to access all photos stored on your Mac, initiate the process by following this step-by-step guide.
Step 1: To begin, sign in with the same Apple ID credentials on both Apple devices. Then, move towards the "Settings" app on your MacBook and tap your Apple ID option at the top. Afterward, choose the “iCloud” option and click the "Photos" feature. Now, toggle the "Sync this Mac” option to access photos that you have stored on the Mac on all Apple devices.

Step 2: Switch to your iPhone, open the “Settings” app, and access your Apple ID details from the top. Then, choose the “iCloud” option followed by the “Photos” option and toggle the “Sync this iPhone” option. Finally, the images of your iPhone’s iCloud will be synced on your MacBook and vice versa when the syncing completes.

You can also use the web version of iCloud to transfer photos and media files from your Mac to your iPhone without using cable wire. However, this method limits you if you don't remember the Apple ID credentials. Furthermore, you can sync your contacts, reminders, and notes using iCloud. Without making it complicated, let's begin with a step-by-step guide explaining how to get photos from MacBook to iPhone.
Step 1. Search iCloud.com on your MacBook through Safari or any other browser and sign in with your Apple ID credentials. Once you are signed in, click on the "Photos" widget from its homepage, and you will be redirected to the iCloud Photos page.

Step 2. Afterward, hit the "Upload" icon from the top right side, select the images from the Finder, and click the "Open" button to bring your photos to iCloud. After the upload, the images will be automatically synchronized with your Apple devices, and you can access them through your iPhone.

Most people use email to share PDF and image files for personal tasks or for professional communication. Notably, you can also use Gmail to transfer your photos from a MacBook to an iPhone within the limit of 25MB.
If you have larger photos, upload the images to Google Drive and share the link via email to access the photos. To conveniently use Gmail, we have discussed the steps below, which you can follow immediately.
Step 1: Access your Gmail account from your Mac and press the "Compose" option to begin with a new email. Type the receiver address, subject, and body from there and press the "Attach Files" symbol to upload the photos. Once you have uploaded the photos, Gmail will take some time to load them and later hit the "Send" button.

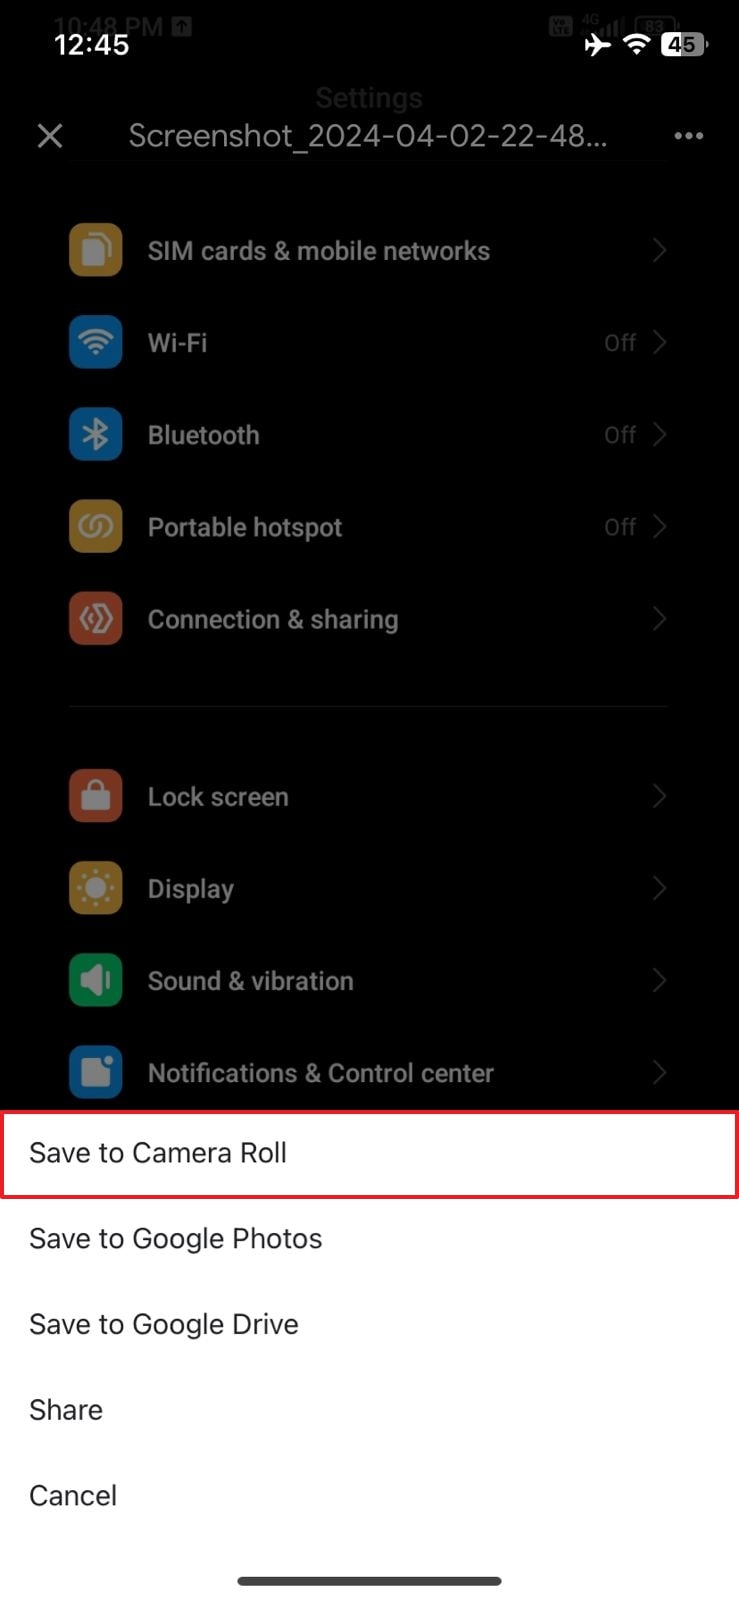
Step 2: Reach towards your iPhone and open the email attachment you shared from the Mac. Open the image and head towards the top-right corner to press the “Three Dots” icon. Lastly, select the "Save to Camera Roll" option from an extended list to save the images on your iPhone.
You are well aware of the famous WhatsApp platform for messaging and calling. However, you might not know it can also serve the purpose of sharing attachments. Using WhatsApp to transfer photos from a MacBook to an iPhone limits you to sending 100 photos simultaneously. For your suitability, we have mentioned a step-by-step guide below that you can follow to transfer photos.
Step 1: Initiate the process from the MacBook and set up the WhatsApp platform through a browser or app. Then, open the chat with yourself and tap the "+ (Attach)" icon at the bottom. Afterward, select the "Photos & Videos" option and hit the “Send” button after choosing them from Finder.

Step 2: Get your iPhone, launch WhatsApp, and continue moving toward the chat you used to share the attachment from your Mac. From there, open the image, press the "Share" icon from the bottom-left, and hit the “Save" button to transfer the photo from a MacBook to an iPhone.

Using wireless methods like Gmail or WhatsApp restricts sharing photos within a certain file size. However, Apple also provides solutions to transfer many files or media from a Mac to an iPhone via cable wire. Previously, you could transfer photos using iTunes on MacOS, but Apple has disconnected it on the latest devices. Therefore, we will discuss one reliable method that is effective for transferring photos from a MacBook to an iPhone.
Instead of iTunes, you can use the Finder app on your macOS as an alternative to process the transfer files. It is easier to use than the previous iTunes app on a MacBook. However, you will need the latest Mac and a certified cable wire from Apple to transfer photos from a MacBook to an iPhone. Start the process by simply following the steps shown below:
Step 1: Connect the wire to the MacBook and iPhone to build a connection. Then, navigate to the Finder app from the macOS and select your target iDevice from the left panel to receive the photos. Continue accessing the "Photos" tab from the toolbar and choose the folder by enabling the "Sync Photos to Your Device" feature. Afterward, use the "Sync" option to select photos and albums.
Step 2: From the "Options," select "Automatically include photos from" to choose the album type. Check the folders that you want to transfer from your MacBook to your iPhone. Then, click "Sync" and hit the "Apply" button to finish the transfer process. Lastly, verify the transferred images from the iPhone Photos app.

In the above discussion, we have guided you through different methods of sending photos from MacBook to iPhone. To find out the easiest way to transfer photos, let's compare all the discussed methods with their accessibility and limitations. Look through the comparison table and choose the one that best satisfies your needs.
|
Solutions |
Easy to Use |
Speed |
File Size Limit |
Security |
|
Avica Remote Desktop |
User-Friendly and Intuitive Operations |
100 Times High-Speed Transfer than HTTP/FTP |
No Limit |
End-to-end Encrypted Security |
|
iCloud.com |
Moderate |
Depends on the Internet |
Free 5GB Storage |
Secure |
|
iCloud Photos |
Moderate |
Depends on the Internet |
Free 5GB Storage |
Secure |
|
|
Moderate |
Slow |
25MB |
Unsecure (Public Servers) |
|
AirDrop |
Moderate |
Depends on File Size |
Theoretically No Limit |
Secure |
|
Chats (WhatsApp) |
Moderate |
Slow |
100 Images at Once |
Secure |
|
Wired Method (Finder) |
Tough |
Fast (Direct Connection) |
No Limit |
Secure |
Before ending the discussion, head to the given solutions of commonly asked questions to understand how to export photos from a MacBook to an iPhone.
Sometimes, you forget to enable the Bluetooth and Wi-Fi options on your MacBook, or it might get turned off while putting you into airplane mode. Therefore, try enabling them to use the AirDrop feature on your MacBook.
Theoretically, there isn’t any limit to transferring photos among Apple devices using the AirDrop feature. However, many people have faced issues while transferring many photos at once.
In the above article, we discussed how to transfer photos from a MacBook to an iPhone with or without a wire. You can choose one of the methods that best suits your needs to streamline your transferring process.
Furthermore, if you want to access the MacBook and transfer the photos remotely, you can use the Avica remote desktop app. This powerful tool doesn’t limit you from transferring photos of certain file sizes, formats, and numbers and ensures a secure, faster, and easiest connection.

Connect Everything, Work Anywhere


